Getting started
Create and publish a form
Prepare your questions in your workspace. Publishing makes a version of the form available to participants.
Updated on
Before you start
- Sign in to your Kiosform workspace.
- Decide on a title and the information you need to collect.
Steps
Start a new form
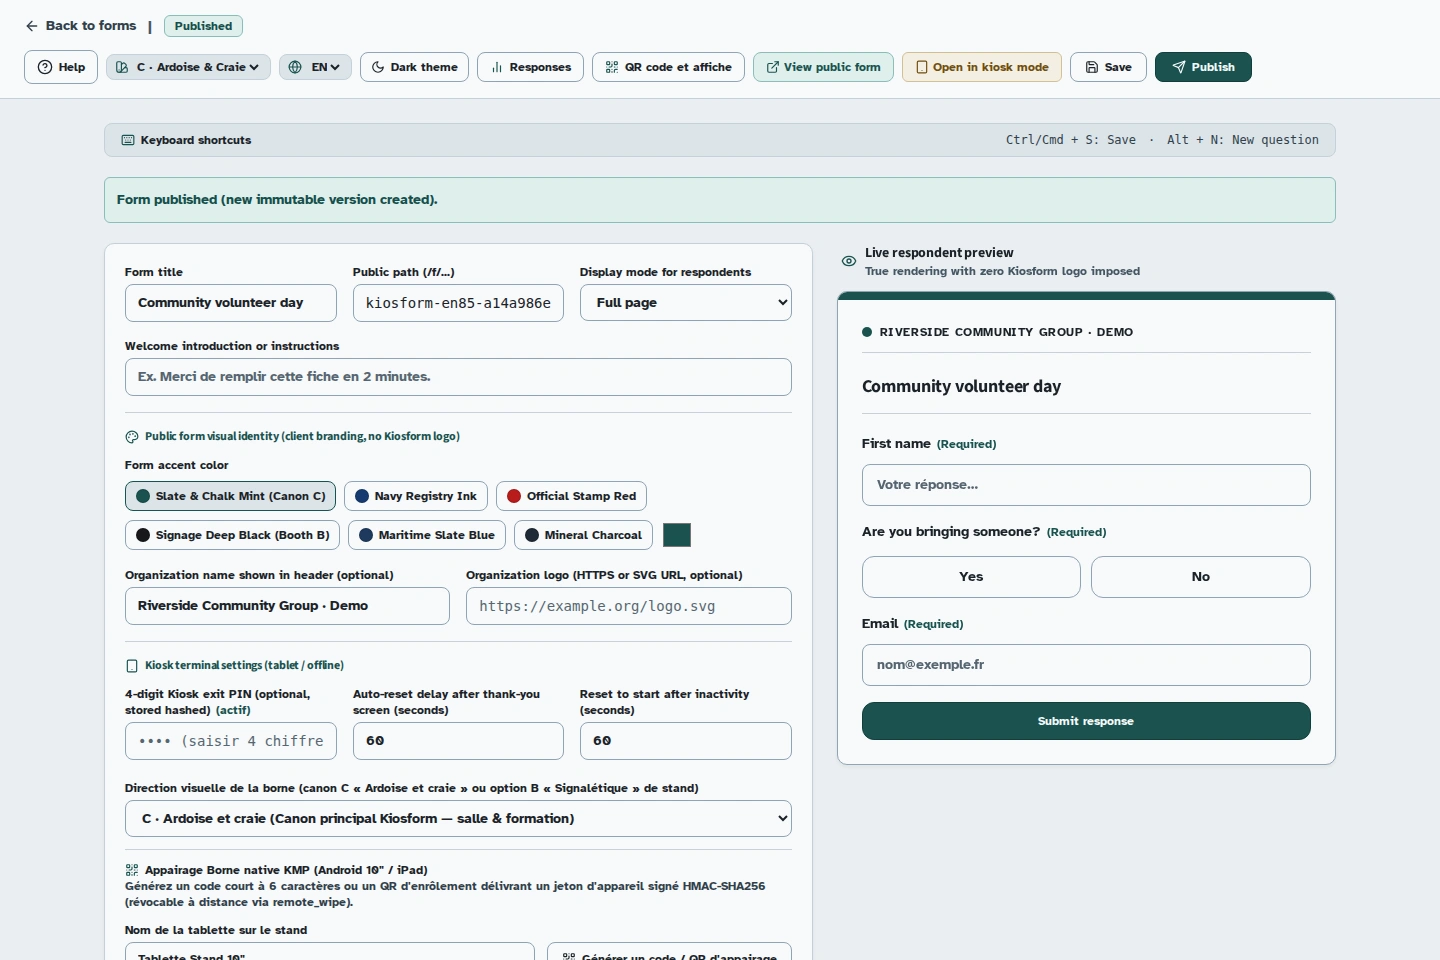
From the form list, click New form. Enter a title and public path, choose the display mode, then confirm. The builder opens.
Add your questions
Under Add an element, choose a type such as Short text or Email. Replace Question prompt and turn on Required answer if needed. The question appears in the preview.
Try the form
Use Live respondent preview. Answer as a participant and try the different choices, especially if you have added conditions. This preview does not submit a response.
Publish
Click Publish. Wait for the Published status: the public link and “QR code et affiche” (QR code and poster) appear in the header.
Share the published version
Open the public link and run a final check before sharing it. After making changes, click Publish again to make them visible. Save on its own keeps your changes in the draft.
Troubleshooting
The public link is missing
Check that the status is Published. If you see a validation error, correct the field indicated and publish again.
My latest change is missing
Reopen the builder and publish the updated draft. Responses already received remain attached to their version of the form.